As a corollary to building my Infor ION Grid laboratory for learning purposes, today I will setup the Grid on MySQL on Ubuntu; it involves re-compiling the Grid.
Why?

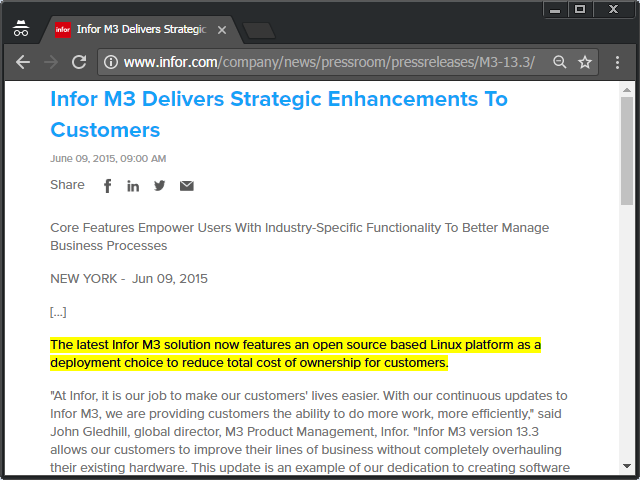
MySQL was a popular free/libre software database from Sweden from the glory days of LAMP, then Sun Microsystems acquired it, then Oracle acquired Sun, then the community forked MySQL into MariaDB to protect its freedom.
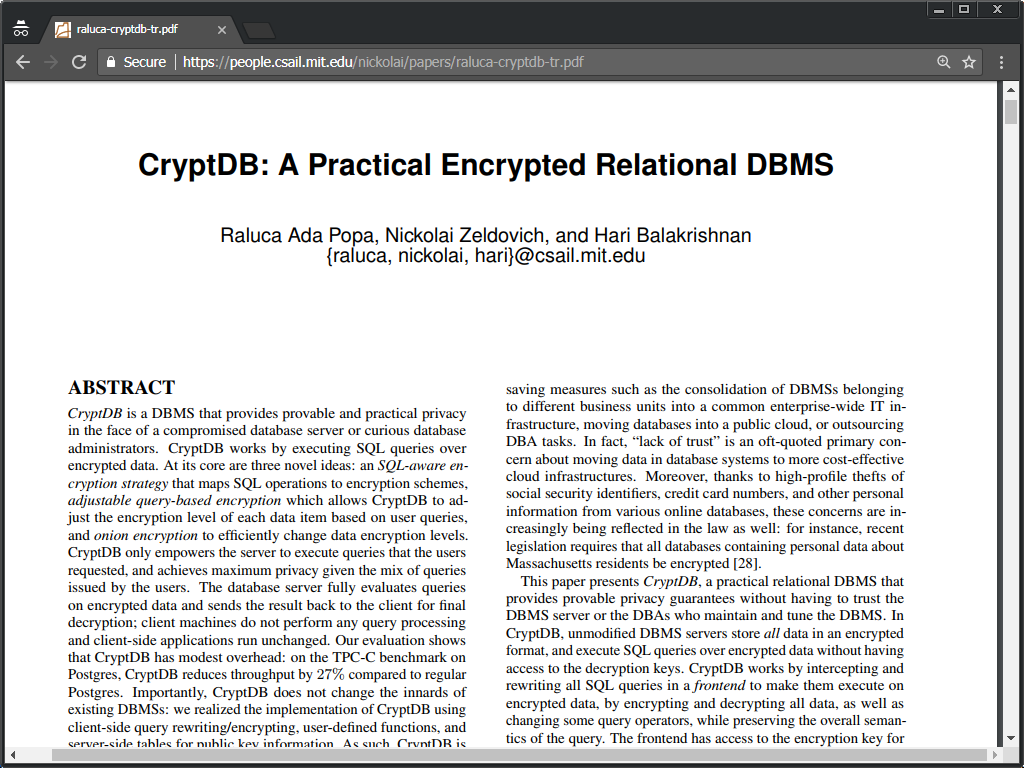
Why bother, given the community moved away from MySQL, and given the Infor Grid does not need or even support MySQL? Well, I am building a proof-of-concept of the Infor Grid on CryptDB, and that requires Ubuntu and MySQL. You will probably never need to know any of this, so I won’t put too much emphasis. I will use what I learned in parts 2, 2bis, and 6.
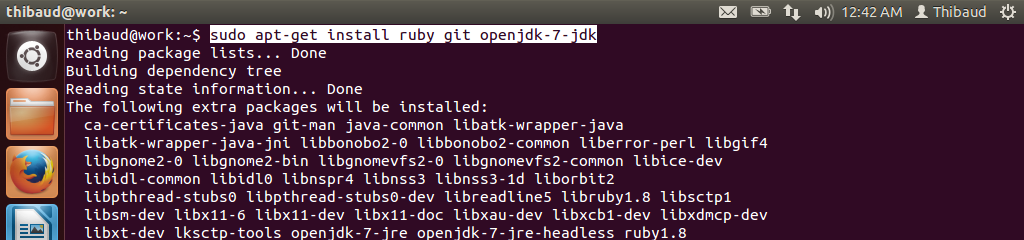
1. Install MySQL + JDK
Install MySQL and the Java Development Kit:
sudo apt-get install mysql-server default-jdk

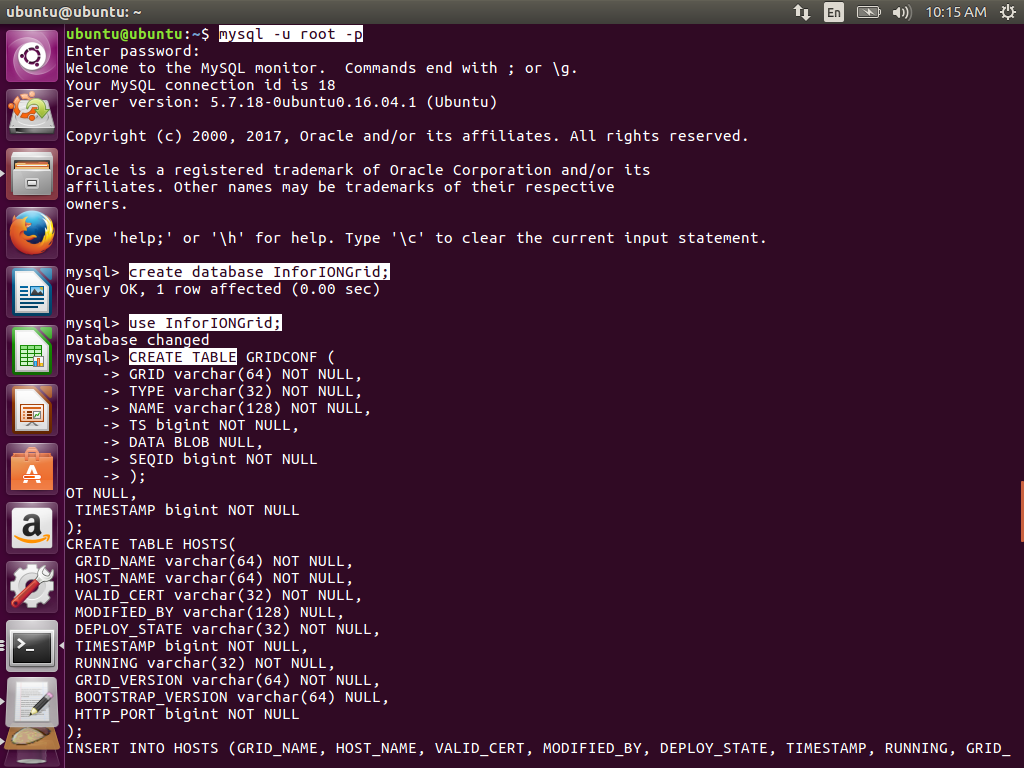
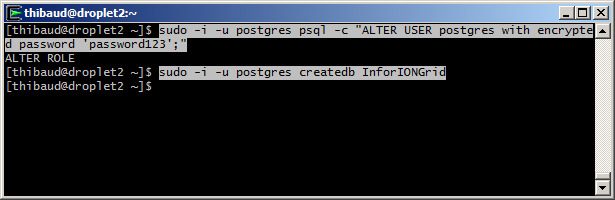
2. Database tables
Create the InforIONGrid database and tables:
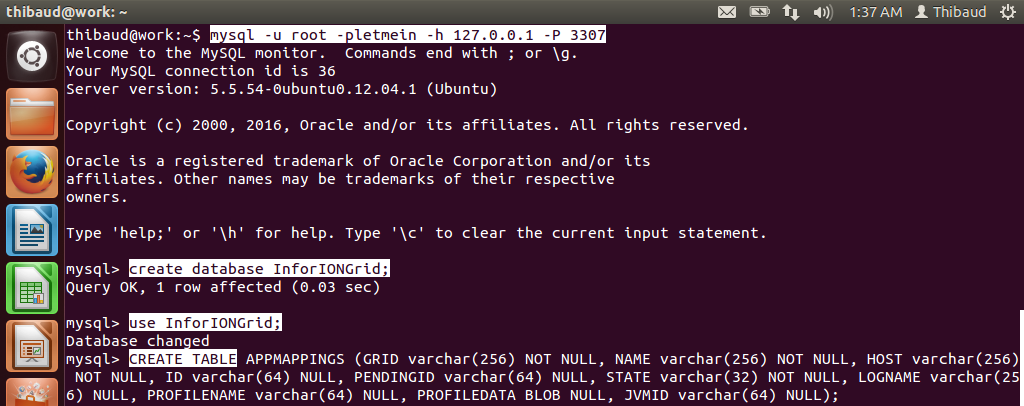
mysql -u root -p
create database InforIONGrid;
use InforIONGrid;
CREATE TABLE APPMAPPINGS (GRID varchar(256) NOT NULL, NAME varchar(256) NOT NULL, HOST varchar(256) NOT NULL, ID varchar(64) NULL, PENDINGID varchar(64) NULL, STATE varchar(32) NOT NULL, LOGNAME varchar(256) NULL, PROFILENAME varchar(64) NULL, PROFILEDATA BLOB NULL, JVMID varchar(64) NULL);
CREATE TABLE EXISTING_GRIDS (GRID_NAME varchar(64) NOT NULL, GRID_VERSION varchar(32) NOT NULL, MODIFIED_BY varchar(128) NULL, TIMESTAMP bigint NOT NULL);
CREATE TABLE GRIDCONF (GRID varchar(64) NOT NULL, TYPE varchar(32) NOT NULL, NAME varchar(128) NOT NULL, TS bigint NOT NULL, DATA BLOB NULL, SEQID bigint NOT NULL);
CREATE TABLE HOSTS (GRID_NAME varchar(64) NOT NULL, HOST_NAME varchar(64) NOT NULL, VALID_CERT varchar(32) NOT NULL, MODIFIED_BY varchar(128) NULL, DEPLOY_STATE varchar(32) NOT NULL, TIMESTAMP bigint NOT NULL, RUNNING varchar(32) NOT NULL, GRID_VERSION varchar(64) NOT NULL, BOOTSTRAP_VERSION varchar(64) NULL, HTTP_PORT bigint NOT NULL);
CREATE TABLE KEY_VALUE_STORE (APPLICATION_NAME varchar(64) NOT NULL, PROPERTY_NAME varchar(256) NOT NULL, PROPERTY_KEY varchar(128) NOT NULL, PROPERTY_VALUE BLOB NULL, PROPERTY_TYPE varchar(256) NOT NULL, PROPERTY_SIZE bigint NOT NULL, SEQID bigint NOT NULL, TIMESTAMP bigint NOT NULL);
INSERT INTO EXISTING_GRIDS (GRID_NAME, GRID_VERSION, MODIFIED_BY, TIMESTAMP) VALUES ('InforIONGrid', 1, 'Thibaud', 0);
INSERT INTO GRIDCONF (GRID, TYPE, NAME, TS, DATA, SEQID) VALUES ('InforIONGrid', 'runtime', 'null', 0, '<?xml version="1.0" ?><runtime xmlns="http://schemas.lawson.com/grid/configuration_v3"><bindings /><sessionProviders developer="true" /><routers><router name="Default Router" host="localhost" httpsPort="50000" httpPort="50001" /></routers><contextRoots /><propertySettings /></runtime>', 0);
INSERT INTO GRIDCONF (GRID, TYPE, NAME, TS, DATA, SEQID) VALUES ('InforIONGrid', 'topology' , 'null', 0, '<?xml version="1.0" ?><topology xmlns="http://schemas.lawson.com/grid/configuration_v3"><hosts><host name="localhost" address="127.0.0.1" gridAgentPort="50003" /></hosts><registry host="localhost" port="50004" /><administrativeRouter host="localhost" port="50005" webStartPort="50006" httpsPort="50007" /></topology>', 0);
INSERT INTO HOSTS (GRID_NAME, HOST_NAME, VALID_CERT, MODIFIED_BY, DEPLOY_STATE, TIMESTAMP, RUNNING, GRID_VERSION, BOOTSTRAP_VERSION, HTTP_PORT) VALUES ('InforIONGrid', 'localhost', 'true', 'Thibaud', 'ACTIVE', 0, 'STARTED', '1.13.77', '1.13.77', 50002);

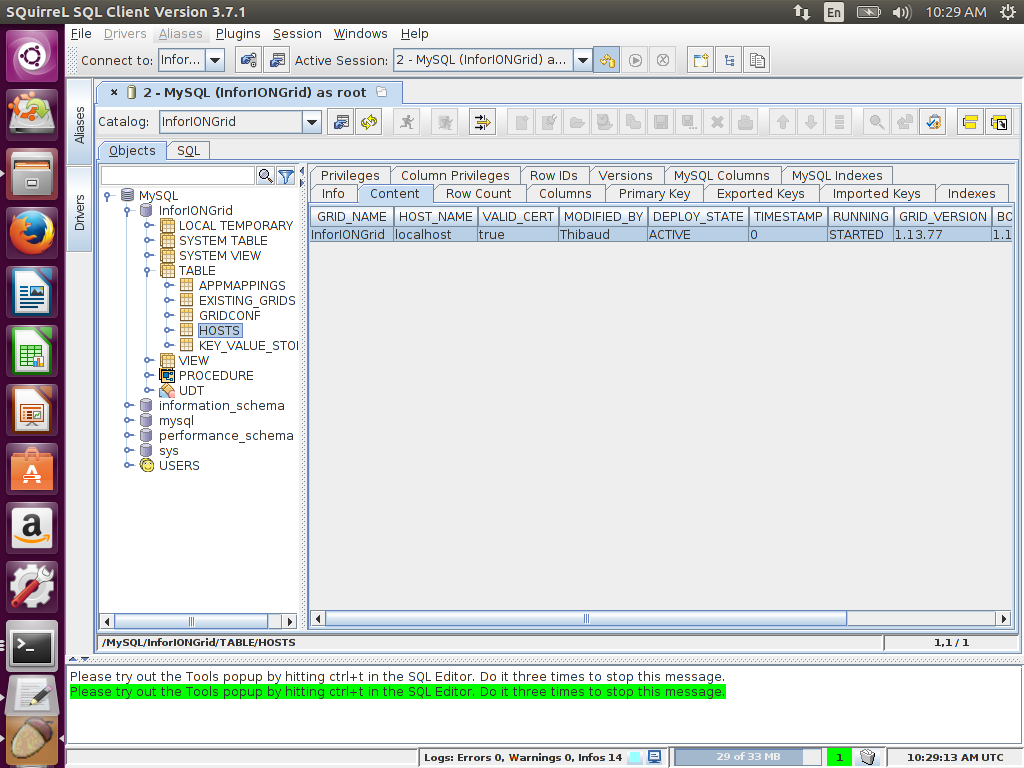
3. JDBC
- Download the JDBC driver for MySQL:
mysql-connector-java-5.1.42-bin.jar

- Test the connection with a JDBC client such as SQuirreL:
jdbc:mysql://localhost:3306/InforIONGrid

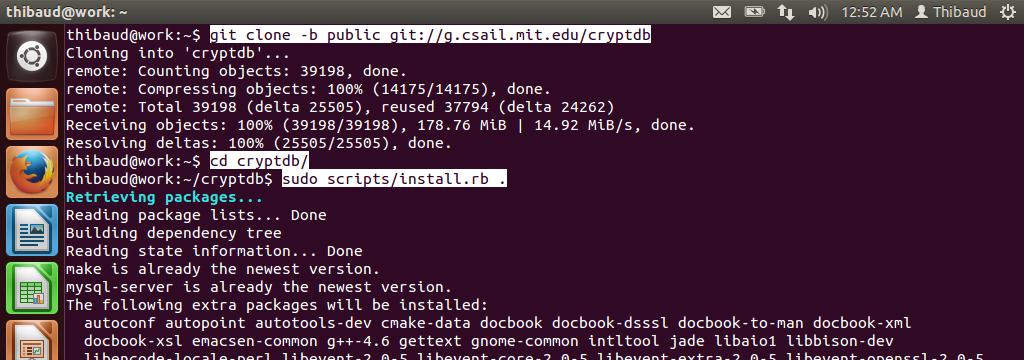
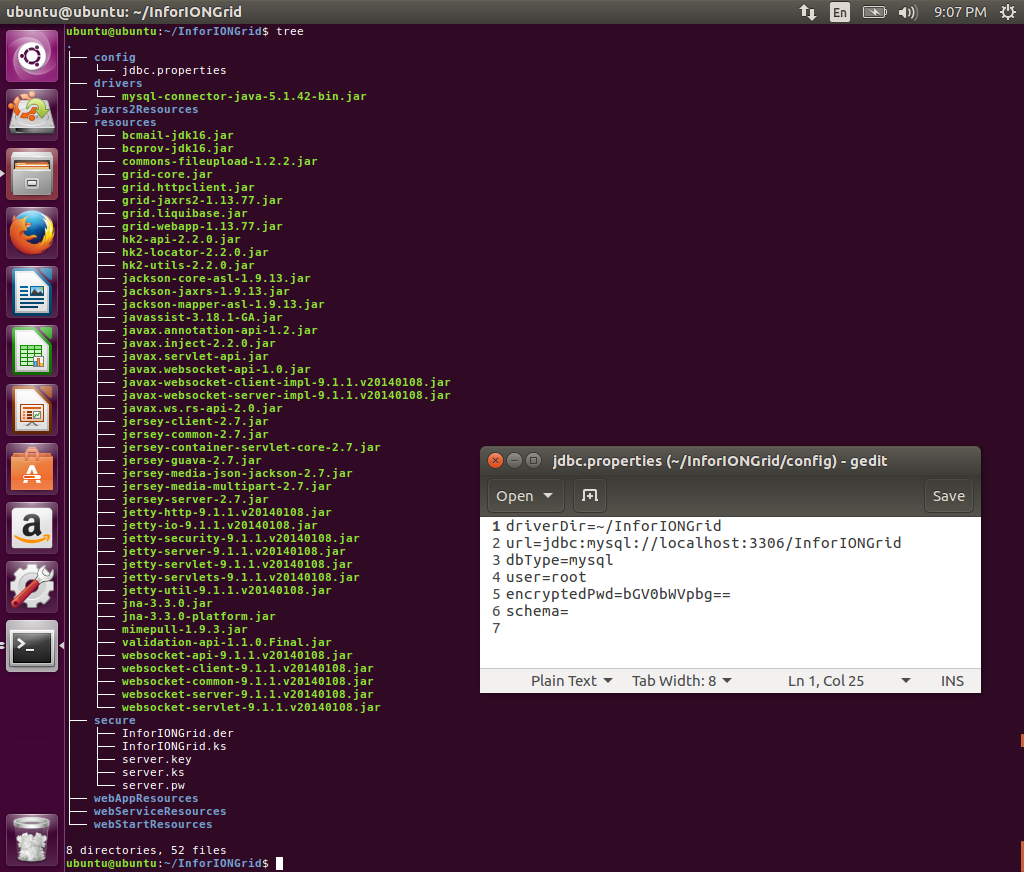
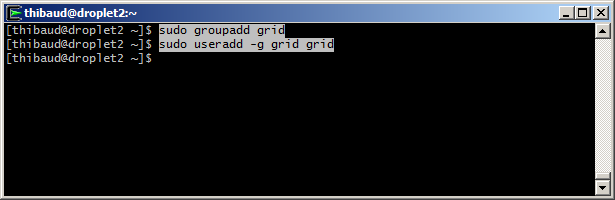
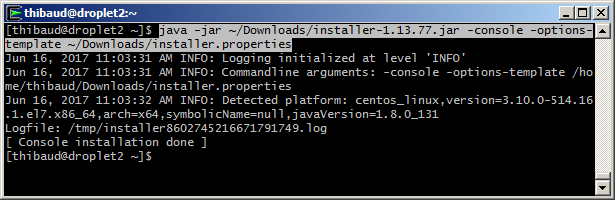
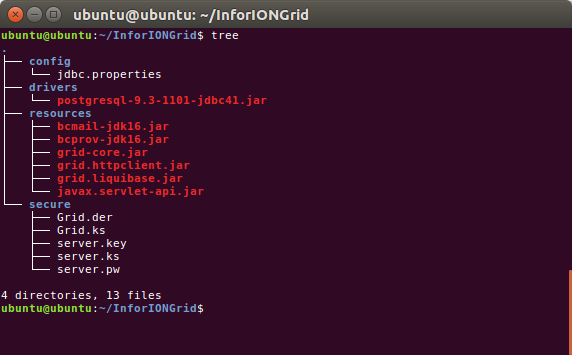
4. Grid files & folders
Create the Grid files and folders as before:

5. Re-compile the Grid
The Grid is hard-coded to only support a few database servers (e.g. Microsoft SQL Server), and MySQL is NOT one of them. However, given the Grid uses Liquibase for database abstraction, and given Liquibase supports MySQL, with some re-compilation of the Grid, it should work on MySQL. Let’s do that.
- Open the file
grid-core.jar and de-compile the following Java class:
com.lawson.grid.jdbc.JDBCProperties

- Re-write the code to add support for MySQL:
static String DB_TYPE_MYSQL = "mysql";
static String JAR_NAME_MYSQL = "mysql-connector-java";
static String CLASS_NAME_MYSQL = "com.mysql.jdbc.Driver";
static String URL_TEMPLATE_MYSQL = "jdbc:mysql://host:port/database";
...
public static String getDbTypeFromConnectionString(String s) {
    ...
    if (... || type.equals(DB_TYPE_MYSQL))
    ...
}
public String getJarNameFromType() {
    ...
    if (type.equals(DB_TYPE_MYSQL))
        return JAR_NAME_MYSQL;
    ...
}
public static String getDriverClassFromType(String type) {
    ...
    if (type.equals(DB_TYPE_MYSQL))
        return CLASS_NAME_MYSQL;
    ...
}
public static String getUrlTemplateFromType(String type) {
    ...
    if (type.equals(DB_TYPE_MYSQL))
        return URL_TEMPLATE_MYSQL;
    ...
}
- The Java Decompiler failed in a few places, and with the help of Krakatau decompiler we can fix them:
public long getPooledCons() {
    synchronized(pool) {
        return pool.size();
    }
}
public static void setDefault(JDBCProperties instance) {
    JDBCProperties.instance = instance; // fixed scope
}
private static void removeDriverManagerReferences(Driver d) {
    ...
    if (isMatchingDriverClass((Class<? extends Driver>)oo.getClass(), d.getClass())) // fixed cast
    ...
}
public void releaseConnection(Connection con) {
    ...
    this.pool.add(new ConnectionWrapper(con)); // fixed null
    ...
}
public GridDatabaseException getSuspendedCause() {
    synchronized(this.suspendedCause) {
        return suspendedCause[0];
    }
}
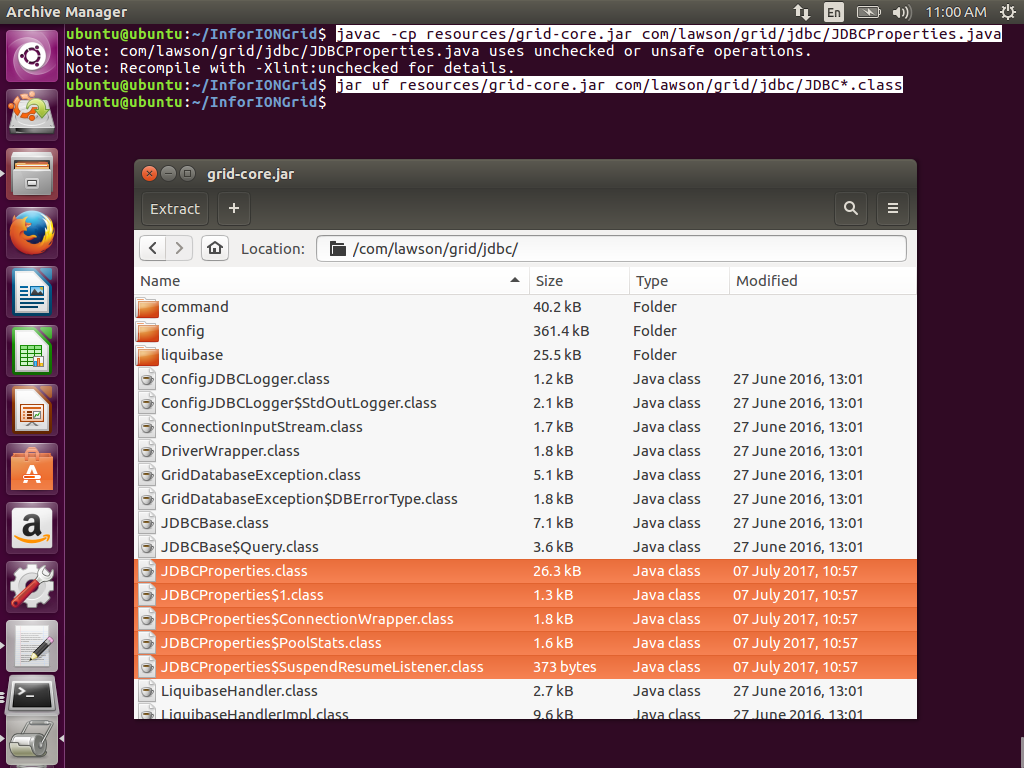
- Re-compile the code, and replace the classes in
grid-core.jar with the new ones:
javac -cp resources/grid-core.jar com/lawson/grid/jdbc/JDBCProperties.java
jar uf resources/grid-core.jar com/lawson/grid/jdbc/JDBC*.class

- Test the re-compiled JAR with the following code (change the InforIONGrid path accordingly), it will dump the config/jdbc.properties and the GRIDCONF topology and runtime XML:
javac -cp resources/grid-core.jar Test.java
java -cp resources/grid-core.jar:drivers/mysql-connector-java-5.1.42-bin.jar:. Test
import java.io.File;
import java.util.List;
import java.sql.Connection;
import java.sql.ResultSet;
import java.sql.Statement;
import com.lawson.grid.jdbc.JDBCProperties;
import com.lawson.grid.jdbc.config.ConfigurationConnector;
import com.lawson.grid.config.ConfigAreaRuntime;
import com.lawson.grid.config.JDBCConfigAreaRuntime;
import com.lawson.grid.config.JDBCUtil;

public class Test  {
    public static void main(String[] args) throws Exception {
        JDBCProperties p = new JDBCProperties();
        JDBCUtil.initFromGridDirectory(p, new File("/home/ubuntu/InforIONGrid"));
        p.toPrintStream(System.out); // dumps config/jdbc.properties
        ConfigAreaRuntime car = new JDBCConfigAreaRuntime(p);
        car.validate();
        Connection c = p.getConnection();
        Statement s = c.createStatement();
        ResultSet r = s.executeQuery("SELECT DATA FROM GRIDCONF");
        while (r.next()) {
            System.out.println(r.getString("DATA")); // dumps XML
        }
        c.close();
        ConfigurationConnector db = new ConfigurationConnector(p);
        System.out.println(db.getGrids()); // [InforIONGrid]
    }
}

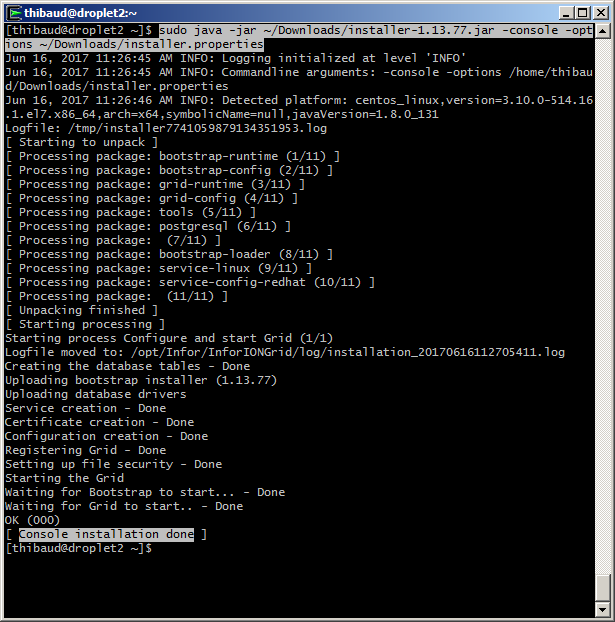
6. Start the Grid
Start the various Grid nodes (change the InforIONGrid path accordingly):
# variables
export CLASSPATH=drivers/mysql-connector-java-5.1.42-bin.jar:resources/bcmail-jdk16.jar:resources/bcprov-jdk16.jar:resources/commons-fileupload-1.2.2.jar:resources/grid-core.jar:resources/grid-jaxrs2-1.13.77.jar:resources/grid-webapp-1.13.77.jar:resources/grid.httpclient.jar:resources/grid.liquibase.jar:resources/hk2-api-2.2.0.jar:resources/hk2-locator-2.2.0.jar:resources/hk2-utils-2.2.0.jar:resources/jackson-core-asl-1.9.13.jar:resources/jackson-jaxrs-1.9.13.jar:resources/jackson-mapper-asl-1.9.13.jar:resources/javassist-3.18.1-GA.jar:resources/javax-websocket-client-impl-9.1.1.v20140108.jar:resources/javax-websocket-server-impl-9.1.1.v20140108.jar:resources/javax.annotation-api-1.2.jar:resources/javax.inject-2.2.0.jar:resources/javax.servlet-api.jar:resources/javax.websocket-api-1.0.jar:resources/javax.ws.rs-api-2.0.jar:resources/jersey-client-2.7.jar:resources/jersey-common-2.7.jar:resources/jersey-container-servlet-core-2.7.jar:resources/jersey-guava-2.7.jar:resources/jersey-media-json-jackson-2.7.jar:resources/jersey-media-multipart-2.7.jar:resources/jersey-server-2.7.jar:resources/jetty-http-9.1.1.v20140108.jar:resources/jetty-io-9.1.1.v20140108.jar:resources/jetty-security-9.1.1.v20140108.jar:resources/jetty-server-9.1.1.v20140108.jar:resources/jetty-servlet-9.1.1.v20140108.jar:resources/jetty-servlets-9.1.1.v20140108.jar:resources/jetty-util-9.1.1.v20140108.jar:resources/jna-3.3.0-platform.jar:resources/jna-3.3.0.jar:resources/mimepull-1.9.3.jar:resources/validation-api-1.1.0.Final.jar:resources/websocket-api-9.1.1.v20140108.jar:resources/websocket-client-9.1.1.v20140108.jar:resources/websocket-common-9.1.1.v20140108.jar:resources/websocket-server-9.1.1.v20140108.jar:resources/websocket-servlet-9.1.1.v20140108.jar
export CONFIG=/home/ubuntu/InforIONGrid
# Registry
java -cp $CLASSPATH com.lawson.grid.Startup -registry -configDir $CONFIG -host localhost -logLevel ALL &
# Default Router
java -cp $CLASSPATH com.lawson.grid.Startup -router "Default Router" -configDir $CONFIG -host localhost -logLevel ALL &
# Administrative Router
java -cp $CLASSPATH com.lawson.grid.Startup -router "Administrative Router" -configDir $CONFIG -host localhost -logLevel ALL &
# Grid Agent
java -cp $CLASSPATH com.lawson.grid.agent.GridAgent -configDir $CONFIG -host localhost -logLevel ALL &
# Grid Management Client
java -jar resources/grid-core.jar localhost 50004 &
# Configuration Manager
java -cp $CLASSPATH com.lawson.grid.config.client.ui.Launch -griddir $CONFIG -ui &
# Import XML
java -cp $CLASSPATH com.lawson.grid.config.JDBCConfigAreaRuntime $CONFIG
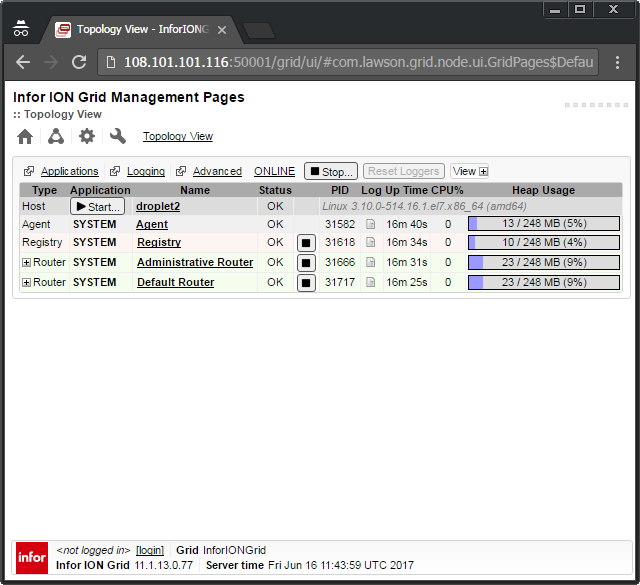
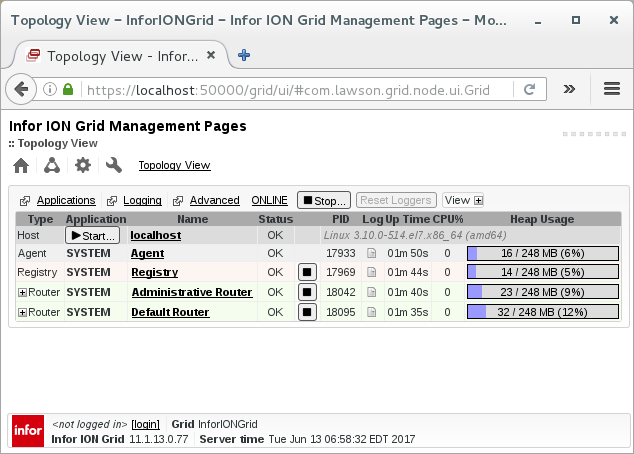
Result
The result is a Grid as usual, running on MySQL:

Conclusion
That was how to run the Infor ION Grid on MySQL after re-compiling the Grid Java classes to make it support MySQL. I will use it in my next proof-of-concept to run the Grid on CryptDB.
That’s it!
Related posts